
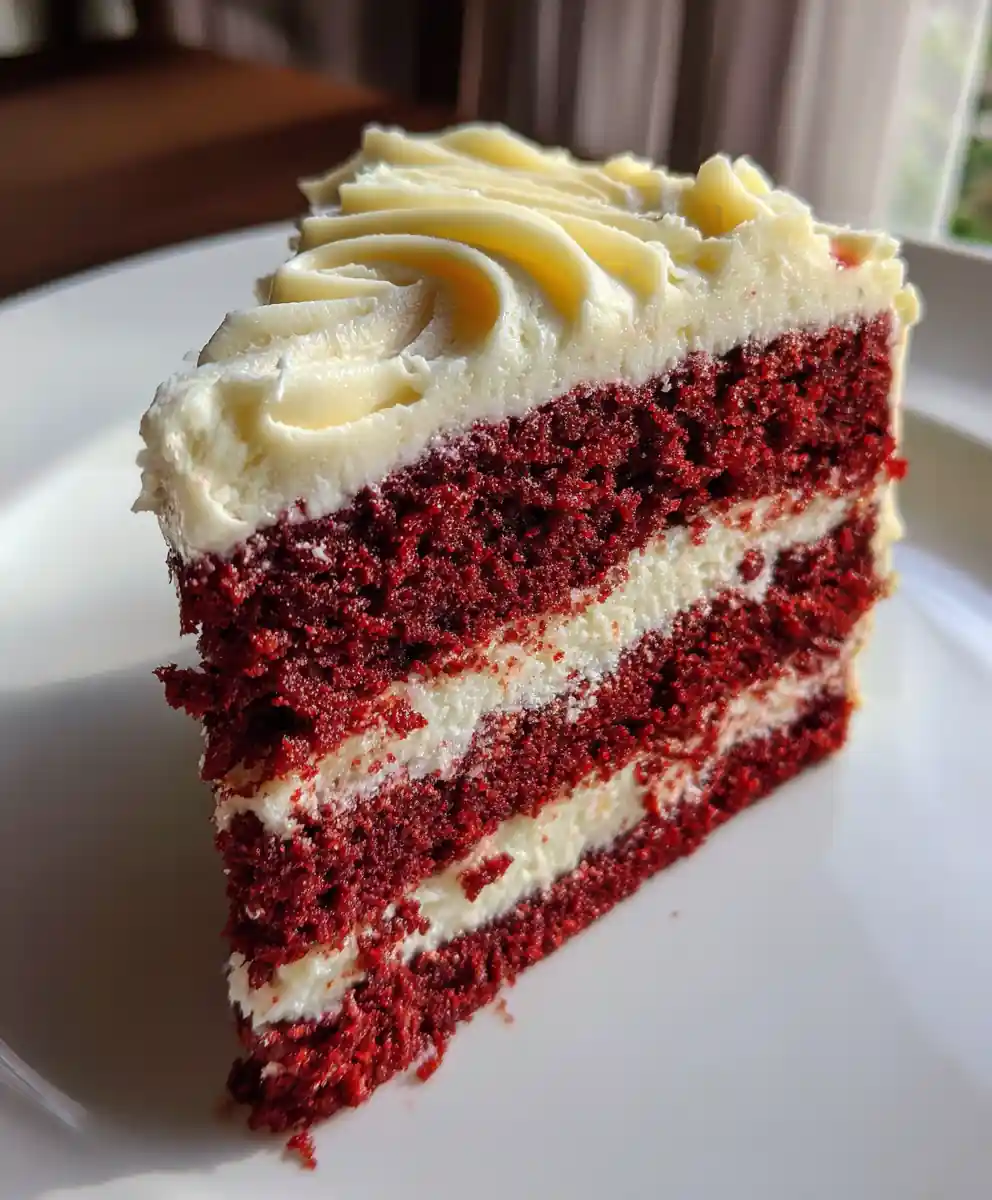
I often crave a show-stopping dessert that feels easier than it looks. This red velvet cake recipe from scratch, Scarlet Velvet with Cream Swirls, always delivers, filling my home with the scent of subtle chocolate and sweet vanilla. Its deep, vibrant red hue and the promise of tangy cream cheese frosting make any family gathering or even a simple weeknight feel special, bringing everyone together for a shared moment of delicious joy.

Ingredient Essentials and Smart Choices
Crafting the perfect red velvet cake recipe from scratch, Scarlet Velvet with Cream Swirls, starts with quality ingredients. Here’s what you’ll need, along with smart substitutions to fit your pantry and preferences.
- All-purpose flour: 2 ½ cups (300g). Provides the cake’s tender structure.
- Unsweetened cocoa powder: 2 Tbsp (14g), natural not Dutch-processed. Adds that signature subtle chocolate depth for your red velvet cake from scratch.
- Baking soda: 1 tsp (5g). Reacts with buttermilk for lift and lightness.
- Salt: ½ tsp (3g). Balances the sweetness.
- Unsalted butter: 1 cup (226g), softened. For richness and a tender crumb. (Use salted butter if that’s what you have, just reduce added salt by ¼ tsp.)
- Granulated sugar: 1 ½ cups (300g). Sweetens and tenderizes the cake.
- Large eggs: 2, at room temperature. Binds ingredients and adds moisture.
- Pure vanilla extract: 1 tsp (5ml). Essential for flavor in both cake and frosting.
- Buttermilk: 1 cup (240ml), at room temperature. Key for moisture and reacting with baking soda. (If no buttermilk, add 1 Tbsp white vinegar or lemon juice to 1 cup regular milk, let sit 5 minutes.)
- Red gel food coloring: 1-2 Tbsp, or as needed for desired hue. Creates the iconic scarlet color.
- White vinegar: 1 tsp (5ml). Boosts the buttermilk’s acidity for extra lift.
For the Cream Swirl Frosting:
- Cream cheese: 8 oz (226g), softened. The tangy heart of our frosting.
- Unsalted butter: ½ cup (113g), softened. Adds richness and creaminess.
- Powdered sugar: 3-4 cups (360-480g), sifted. Sweetens and thickens the frosting. Adjust to your preferred sweetness.
- Pure vanilla extract: 1 tsp (5ml). For classic flavor.
Alternative Swaps & Upgrades
Customizing your red velvet cake from scratch for dietary needs or flavor preferences is easy with these simple swaps.
- Gluten-free flour blend: Substitute a 1:1 baking blend for all-purpose flour. Ensure it contains xanthan gum for structure.
- Dairy-free options: Use plant-based buttermilk (dairy-free milk + lemon juice) and vegan cream cheese/butter alternatives.
- Natural coloring: Beet powder or juice (1-2 Tbsp) can offer a subtle pinkish-red hue for a less vibrant but natural option.
Flavor Boosters & Seasonal Tips
Elevate your red velvet cake from scratch with these flavor boosters for an even more memorable dessert.
- A pinch of espresso powder: About ½ tsp added to the cocoa powder deepens chocolate flavor without making it taste like coffee.
- Good quality vanilla extract: Opt for pure vanilla for superior aroma and taste in both cake and frosting.
- Citrus zest: A teaspoon of fresh orange or lemon zest in the cream cheese frosting offers a bright counterpoint, especially lovely for family gatherings.
- Top with fresh berries: Raspberries or strawberries add seasonal flair and a burst of freshness.
Step-by-Step Cooking Method
Making this red velvet cake recipe from scratch involves simple steps, ensuring a tender, moist result every time.
- Prep Your Pans: Grease and lightly flour two 8-inch round cake pans. Line the bottoms with parchment paper for easy release. Preheat your oven to 350°F (175°C). (5 min prep; oven should feel warm and ready.)
- Mix Dry Ingredients: In a medium bowl, whisk together the flour, cocoa powder, baking soda, and salt. Set aside. (2 min; mixture should look uniform and light brown.)
- Cream Wet Ingredients: In a large bowl using an electric mixer, cream the softened butter and granulated sugar until light, pale, and fluffy. Beat in the eggs one at a time, mixing well after each addition, then stir in the vanilla extract. (5-7 min; mixture will be visibly airy and pale yellow.)
- Combine & Color: In a separate small bowl, whisk together the buttermilk, red gel food coloring, and white vinegar. Gradually add the dry ingredients to the wet ingredients, alternating with the buttermilk mixture, beginning and ending with dry. Mix on low speed until just combined – do not overmix! (5 min; batter should be a vibrant, even red and still a little lumpy, which is fine.) If the color isn’t quite right, add a few more drops of gel coloring and mix briefly.
- Bake Cake Layers: Divide the vibrant red batter evenly between the two prepared 8-inch round cake pans. Bake for 25-30 minutes, or until a toothpick inserted into the center of a cake comes out clean. (25-30 min; edges should appear set and golden, the top lightly springy to the touch.) I often rotate my pans halfway through for even baking.
- Cool & Frost: Let the cakes cool in their pans for 10-15 minutes on a wire rack. Then, carefully invert them onto the wire rack to cool completely. This step is crucial for perfect frosting! (45-60 min; cakes should be completely cool to the touch before frosting to prevent any melting.) While cooling, prepare your cream cheese frosting: beat softened cream cheese and butter until smooth, then gradually add the sifted powdered sugar and vanilla until smooth and fluffy. Frost your Scarlet Velvet red velvet cake from scratch with generous layers and swirls.
Common Mistakes & How to Avoid Them
To perfect your red velvet cake recipe from scratch, pay attention to these common pitfalls for a moist, tender result.
- Overmixing the batter: Leads to a tough, dry cake. Mix only until the ingredients are just combined, and no pockets of flour remain.
- Using cold ingredients: For a smooth batter and creamy frosting, ensure butter, cream cheese, and eggs are at room temperature. This allows them to emulsify properly.
- Not cooling cakes completely: Frosting will melt and slide off if cakes are even slightly warm. Patience is truly key here for a beautiful finish.
Serving Suggestions and Everyday Uses
This stunning dessert effortlessly elevates any meal, turning ordinary moments into cherished memories. It’s a wonderful addition to any spread, offering family-friendly delight.
Best Occasions:
- Weeknight Dinners: A delightful surprise treat for the family after a long day.
- Gatherings & Celebrations: A stunning centerpiece for birthdays, holidays, or potlucks.
- Holiday Desserts: Perfect for festive tables, adding a touch of elegance.
Pairings:
- Sides: A simple scoop of vanilla bean ice cream or a dollop of freshly whipped cream.
- Drinks: Pairs wonderfully with a rich cup of coffee, a comforting tea, or a tall glass of cold milk.
Storage and Reheating Advice:
Store leftover red velvet cake in an airtight container at room temperature for up to 2 days, or refrigerate for up to 5 days. For meal prep, cake layers wrap tightly and freeze for up to 2 months, thawing overnight before frosting.
Nutrition, Wellness, and Lifestyle Benefits of red velvet cake recipe from scratch Scarlet Velvet with Cream Swirls
Baking this red velvet cake from scratch offers more than just a delicious dessert; it brings a sense of accomplishment and control. It supports a balanced lifestyle by encouraging mindful indulgence in homemade treats.
The joy of creating something beautiful from scratch, like this Scarlet Velvet cake, can be a wonderful, stress-reducing activity. It’s a fantastic way to bring everyone together around the table, fostering family connection with delicious family dinner ideas.
Everyday Value and Reader Goals
Save Time, Money, Effort:
Making a red velvet cake from scratch is more economical than bakery cakes and offers superior flavor. This rewarding process builds confidence, perfect for quick meals or family dinners.
Practical Benefits:
- Meal Prep: Bake cake layers ahead of time and freeze them for quick assembly later in the week.
- Portion Control: Easily slice and serve individual pieces, freezing extra slices for future convenient treats.
- Leftovers: Enjoy delicious slices for dessert the next day or as a delightful afternoon snack.
Versatility for Different Lifestyles:
- Customization: Easily adapt ingredients for dietary preferences, making it a flexible family-friendly recipe.
- Family Fun: A great way to involve kids in baking, creating lasting memories and teaching basic kitchen skills.
- Impress Guests: Effortlessly present a beautiful, homemade dessert for any gathering, showcasing your baking prowess.
Expert Tips, Variations, and Adjustments
Advanced Cooking Tricks:
- Room Temperature Ingredients: Always ensure butter, cream cheese, and eggs are at room temperature for a smooth batter and fluffy frosting every time.
- Crumb Coat: Apply a thin layer of frosting first to seal in crumbs, then chill for 15-20 minutes before adding the final, generous frosting layer.
- Don’t Overbake: Use a toothpick test to ensure moistness; remove promptly when clean to avoid a dry cake.
Seasoning and Spice Personalization:
- Citrus Zest: Add a teaspoon of orange or lemon zest to the frosting for a brighter, more vibrant flavor profile.
- Subtle Spice: A tiny pinch of cinnamon or nutmeg can add a hidden warmth and depth to the cake batter.
Adaptations for Dietary Needs:
- Diabetic-Friendly: Explore sugar substitutes like erythritol or stevia in both the cake and frosting, following package instructions for equivalent sweetness.
- Allergen Swaps: Utilize a 1:1 gluten-free flour blend, and dairy-free alternatives for buttermilk and butter to suit various needs. For the buttermilk, I often use a cup of plant-based milk with a tablespoon of lemon juice, letting it sit for five minutes.
Common Questions Answered
Is red velvet cake good for a balanced diet?
While an indulgent treat, baking your red velvet cake from scratch allows for mindful enjoyment. It’s a dessert to savor for special occasions, knowing exactly what ingredients went into it. Enjoy it as part of healthy eating, not as an everyday staple.
What’s the best way to store Scarlet Velvet red velvet cake for meal prep?
For effective meal prep, bake the cake layers, cool them completely, then wrap them tightly in plastic wrap and foil. They can be frozen for up to two months. When ready to serve, thaw the layers overnight in the refrigerator and then prepare the cream cheese frosting fresh.
Can I use this red velvet cake recipe from scratch with online grocery delivery?
Absolutely! All the ingredients for this red velvet cake recipe from scratch are standard pantry items. You can easily find them on any online grocery delivery service, making it a convenient choice for busy families. Just add them to your cart!
How can I ensure my red velvet cake is moist?
To ensure a moist red velvet cake, avoid overmixing and precisely measure ingredients. Never overbake; remove as soon as a toothpick comes out clean. The buttermilk and vinegar in this Scarlet Velvet recipe significantly contribute to a tender crumb.
Can I make red velvet cupcakes with this recipe?
Yes, this red velvet cake recipe from scratch adapts beautifully to cupcakes! I often use mini muffin tins for my kids, reducing baking time for perfect bite-sized treats. For standard cupcakes, bake about 18-22 minutes.
Can I make this red velvet cake recipe gluten-free or dairy-free?
Yes, absolutely! For a gluten-free option, swap the all-purpose flour for a 1:1 gluten-free baking blend, ensuring it contains xanthan gum. For dairy-free, use plant-based milk with a tablespoon of lemon juice for buttermilk, and opt for vegan butter and cream cheese alternatives in the cake and frosting.
Conclusion
This Scarlet Velvet red velvet cake from scratch is pure joy, a beautiful moment of homemade goodness. I find there’s nothing quite like sharing a slice of this beautiful cake with loved ones. Pin this red velvet cake recipe from scratch Scarlet Velvet with Cream Swirls for your next family gathering or meal planning!
Print
red velvet cake recipe from scratch Scarlet Velvet with Cream Swirls
- Total Time: 120 minutes
- Yield: 12-16 servings
- Diet: General
Description
This Scarlet Velvet with Cream Swirls red velvet cake is a show-stopping dessert, featuring a deep, vibrant red hue, subtle chocolate, sweet vanilla, and tangy cream cheese frosting, perfect for any special occasion or family gathering.
Ingredients
- 2.5 cups all-purpose flour (300g)
- 2 Tbsp unsweetened cocoa powder (14g), natural not Dutch-processed
- 1 tsp baking soda (5g)
- 0.5 tsp salt (3g)
- 1 cup unsalted butter (226g), softened
- 1.5 cups granulated sugar (300g)
- 2 large eggs, at room temperature
- 1 tsp pure vanilla extract (5ml)
- 1 cup buttermilk (240ml), at room temperature
- 1–2 Tbsp red gel food coloring, or as needed for desired hue
- 1 tsp white vinegar (5ml)
- 8 oz cream cheese (226g), softened
- 0.5 cup unsalted butter (113g), softened
- 3–4 cups powdered sugar (360-480g), sifted
- 1 tsp pure vanilla extract (5ml)
Instructions
- Prep Your Pans: Grease and lightly flour two 8-inch round cake pans. Line the bottoms with parchment paper for easy release. Preheat your oven to 350°F (175°C).
- Mix Dry Ingredients: In a medium bowl, whisk together the flour, cocoa powder, baking soda, and salt. Set aside.
- Cream Wet Ingredients: In a large bowl using an electric mixer, cream the softened butter and granulated sugar until light, pale, and fluffy. Beat in the eggs one at a time, mixing well after each addition, then stir in the vanilla extract.
- Combine & Color: In a separate small bowl, whisk together the buttermilk, red gel food coloring, and white vinegar. Gradually add the dry ingredients to the wet ingredients, alternating with the buttermilk mixture, beginning and ending with dry. Mix on low speed until just combined (do not overmix). If the color isn’t quite right, add a few more drops of gel coloring and mix briefly.
- Bake Cake Layers: Divide the vibrant red batter evenly between the two prepared 8-inch round cake pans. Bake for 25-30 minutes, or until a toothpick inserted into the center of a cake comes out clean.
- Cool & Frost: Let the cakes cool in their pans for 10-15 minutes on a wire rack. Then, carefully invert them onto the wire rack to cool completely (45-60 min). While cooling, prepare your cream cheese frosting: beat softened cream cheese and butter until smooth, then gradually add the sifted powdered sugar and vanilla until smooth and fluffy. Frost your cake with generous layers and swirls.
Notes
Avoid overmixing the batter, which leads to a tough cake. Ensure butter, cream cheese, and eggs are at room temperature for a smooth batter and creamy frosting. Always cool cakes completely before frosting to prevent melting. Consider gluten-free flour blends, dairy-free alternatives, or natural beet powder for coloring. Enhance flavor with a pinch of espresso powder, good quality vanilla extract, or citrus zest in the frosting. Top with fresh berries for seasonal flair.
- Prep Time: 30 minutes
- Cook Time: 28 minutes
- Category: Dessert
- Method: Baking
- Cuisine: American
Nutrition
- Serving Size: 1 slice (110 g)
- Calories: 450 calories
- Sugar: 55 g
- Sodium: 300 mg
- Fat: 28 g
- Saturated Fat: 16 g
- Unsaturated Fat: 10 g
- Trans Fat: 0 g
- Carbohydrates: 65 g
- Fiber: 1 g
- Protein: 5 g
- Cholesterol: 100 mg
FREE PRINTABLE RECIPE
Get the Printable Recipe PDF (Free)
Enter your email and we’ll send you the ingredients + step-by-step instructions as a clean PDF you can save to your phone.
- ✅ Printable PDF (ingredients + steps)
- ✅ Save it to your phone (no long scrolling)
- ✅ Includes cook time + servings
- ✅ Easy to follow
FAQ
Where’s the full recipe?
It’s delivered as a printable PDF so you can save it and cook without scrolling.
I didn’t get the email.
Check Spam/Promotions and search your inbox for your site name. Then click Confirm to receive the PDF.