
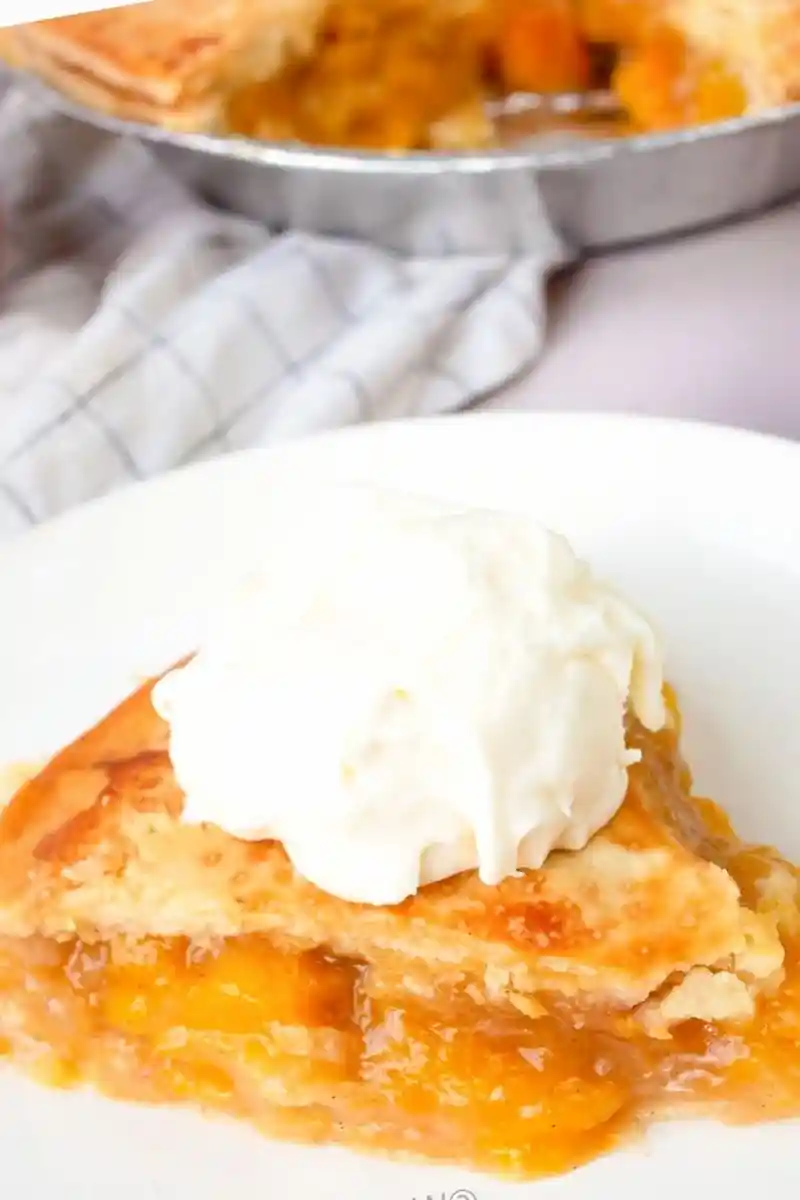
Prepare a classic summer dessert with this detailed peach pie recipe. This guide ensures a flaky, buttery crust and a perfectly thickened fruit filling using fresh ingredients.
List of ingredients
- Dough for double-crust pie – used for the base and top layer.
- 2/3 cups sugar – provides sweetness to the filling.
- 1/3 cup all-purpose flour – acts as the primary thickening agent.
- 1/4 teaspoon ground cinnamon – adds a warm spice profile.
- 5 cups sliced peeled fresh peaches (about 5 to 6 medium peaches) – the main fruit component.
- 1 teaspoon lemon juice – prevents browning and balances sweetness.
- 1 egg mixed with 1 tablespoon of milk – used for the golden glaze.
step-by-step instructions
- Preheat Oven: Set your oven to 400 degrees F.
- Prepare Bottom Crust: On a lightly floured surface, roll one half of the dough into a 1/8 inch thick circle large enough for a 9 inch pie plate. Transfer the dough to the plate and refrigerate while you prepare the filling.
- Mix Filling: In a large bowl, combine the sugar, flour, and cinnamon. Stir in the sliced peaches and lemon juice until evenly coated.
- Fill Crust: Pour the peach mixture into the chilled pie crust and return the assembly to the refrigerator to chill.
- Add Top Crust: Roll the remaining dough into a 1/8 inch thick circle and place it over the chilled pie. Trim the edges of both crusts, leaving enough bottom crust to fold over the top. Crimp the edges together to seal the pie.
- Vent the Pie: Use a sharp knife to slash several vents in the top crust to allow steam to escape.
- Final Chill: Place the assembled pie in the refrigerator for at least 30 minutes before baking.
- Prepare Baking Sheet: Position the oven rack in the bottom third of the oven. Line a baking sheet with parchment paper or aluminum foil to catch potential drips.
- Prepare Glaze: Whisk together the egg and one tablespoon of milk.
- Glaze and Sugar: Remove the pie from the refrigerator, brush the top with the egg-milk mixture, and sprinkle with white sugar. Place the pie on the prepared baking sheet.
- Bake: Bake in the bottom third of the oven for 45 minutes to an hour, or until the filling is bubbling in the center.
- Cool and Serve: Serve the pie while warm or allow it to cool completely before slicing.
Selecting the Best Peaches for Baking
Freestone Peach Selection
Freestone peaches are highly recommended for pie making because the pit does not cling to the fruit. This makes them much easier to slice into uniform pieces. Uniform slices ensure that the fruit cooks evenly throughout the baking process.
Clingstone Peach Handling
Clingstone peaches have flesh that adheres tightly to the pit, requiring more effort to peel and slice. If using these, carefully cut around the stone to minimize waste. They are equally flavorful but demand more preparation time.
Paper Bag Ripening Method
To ripen hard peaches quickly, place them individually in a paper bag on the counter. Ensure the peaches are not touching each other to avoid bruising. Check them after 24 hours; they should be soft enough for slicing.
Blanching and Shocking for Peeling
Peel peaches by cutting a small X in the bottom and submerging them in boiling water for 30 seconds. Immediately transfer them to a bowl of ice water to stop the cooking. The skins will then slide off easily without removing too much fruit flesh.
Using Alternative Peach Sources
Draining Frozen Peaches
Frozen peaches can be used as a substitute when fresh fruit is unavailable. Thaw them completely and drain the excess liquid thoroughly before adding them to the sugar mixture. Excess moisture from frozen fruit can lead to a runny pie filling.
Managing Canned Peach Syrup
Canned peaches are a convenient year-round option and are often pre-peeled. Drain the syrup well to prevent the filling from becoming overly sweet or liquid. If using peaches in heavy syrup, you may want to slightly reduce the added sugar in the recipe.
Mastering the Pie Crust
Temperature Control for Flakiness
Keep your pie dough as cold as possible until it enters the oven. Chilling the dough ensures the fat remains solid, which creates steam pockets during baking. This process is what results in a tender, flaky, and crispy crust texture.
Flour Dusting for Rolling
Use a light dusting of all-purpose flour on your work surface to prevent the dough from sticking. Avoid over-flouring, as too much extra flour can be incorporated into the dough. This can make the final crust tough rather than tender.
Bottom Crust Pre-baking
If you struggle with a soggy bottom, consider pre-baking the bottom crust for a few minutes. This creates a moisture barrier before the fruit filling is added. Ensure the dough is chilled before this step to maintain the structure.
Crucial Baking Techniques
Egg Wash Application
The egg and milk mixture acts as a glaze that promotes a deep golden-brown color. Apply it evenly across the entire top surface using a pastry brush. This glaze also helps the sprinkled sugar adhere to the crust during baking.
Parchment Paper Protection
Always place your pie on a lined baking sheet, regardless of how well it is crimped. Fruit pies often bubble over, and the juices can burn on the oven floor. Parchment paper makes cleanup easy and prevents smoke in the kitchen.
Bottom-Third Rack Placement
Positioning the pie in the bottom third of the oven ensures the heat hits the bottom crust directly. This helps the lower crust cook through and prevents the common issue of an underbaked base. It allows the filling to bubble effectively.
Foil Shielding for Crust
If the edges of the crust begin to brown too quickly while the center is still uncooked, cover the pie loosely with aluminum foil. This reflects some of the direct heat away from the crust. It allows the filling to reach the proper temperature without burning the edges.
Vent Size and Placement
Cut vents that are about one inch long and spaced evenly across the top. These openings allow steam to escape from the bubbling fruit filling. Without vents, the steam can build up and cause the top crust to lift or burst.
Optimal Serving Suggestions
Vanilla Ice Cream Pairing
Serving a warm slice of peach pie with a scoop of vanilla ice cream creates a classic contrast. The cold creaminess of the ice cream balances the heat of the pie. The vanilla flavor complements the acidity of the lemon juice and the sweetness of the peaches.
Freshly Whipped Cream Topping
For a lighter alternative to ice cream, use homemade whipped cream. Beat heavy cream with a small amount of powdered sugar until stiff peaks form. A dollop of cream adds a rich texture that enhances the buttery flavor of the crust.
Serving Temperature
While some prefer the pie warm, allowing it to cool for at least two hours helps the filling set. A cooled pie is much easier to slice cleanly. If you prefer it warm, reheat individual slices in the oven rather than the whole pie.
Preservation and Storage Methods
Refrigerator Storage Limits
Store leftover baked peach pie in the refrigerator for up to three days. Cover the pie tightly with aluminum foil or place it in a dedicated pie carrier to prevent it from absorbing other fridge odors. Keep it on a middle shelf for consistent temperature.
Freezing Unbaked Pies
You can assemble the pie completely and freeze it before baking. Wrap the unbaked pie tightly in aluminum foil and then place it in an airtight container. This method preserves the freshness of the crust and filling for up to three months.
Freezing Baked Pies
Baked pies can also be frozen for long-term storage. Let the pie cool completely before wrapping it in foil and plastic wrap. Store it in the freezer for up to three months, ensuring it is well-protected from freezer burn.
Refrigerator Thawing Process
When using a frozen pie, thaw it slowly in the refrigerator overnight. This prevents the crust from becoming soggy due to rapid temperature changes. Avoid thawing the pie on the counter at room temperature.
Oven Reheating Temperatures
To reheat a baked, defrosted pie, use a preheated oven set to 350 degrees F. Heat until the center is warmed through and the crust is crisp. Avoid using a microwave, as this can make the crust rubbery.
Filling Consistency Troubleshooting
Correcting Runny Filling
If your pie is runny, the most common cause is insufficient cooling time. Let the pie sit completely to allow the flour thickener to stabilize. For future pies, ensure the peaches are not overly ripe, as they release more juice.
Controlling Fruit Ripeness
Using peaches that are just ripe rather than overripe prevents the filling from becoming too watery. Overripe fruit breaks down more quickly during baking. If the fruit is very juicy, you can slightly increase the amount of flour used.
Thickener Distribution
Ensure the flour, sugar, and cinnamon are thoroughly mixed before adding the peaches. If the flour clumps, it will not thicken the juices evenly. Stirring the mixture gently but thoroughly ensures a consistent texture throughout the pie.
Frequently Asked Questions
Do I need to peel the peaches?
Peeling is recommended because the skins can become tough and chewy after baking. Peeling also provides a smoother appearance and a more consistent mouthfeel. Blanching them in boiling water makes the peeling process very fast.
Can I use a different thickener?
While this recipe uses all-purpose flour, you can use cornstarch for a clearer filling. If substituting, use about half the amount of cornstarch as you would flour. Cornstarch provides a more gel-like consistency compared to the hearty texture of flour.
How do I know when it is fully cooked?
The pie is done when the crust is golden brown and the filling is bubbling in the center. These bubbles indicate that the thickener has reached the necessary temperature to set. If the filling is not bubbling, the pie may be runny when sliced.
Print
Homemade Fresh Peach Pie
- Total Time: 1 hour 15 minutes
- Yield: 8 to 10 slices
- Diet: General
Description
Packed with summer fresh peaches in a flaky pie crust, this Peach Pie Recipe is the perfect peach dessert for summer.
Ingredients
- Dough for double-crust pie
- 2/3 cups sugar
- 1/3 cup all-purpose flour
- 1/4 teaspoon ground cinnamon
- 5 cups sliced peeled fresh peaches
- 1 teaspoon lemon juice
- 1 egg mixed with 1 tablespoon of milk for glaze
Instructions
- Step 1: Preheat oven to 400 degrees F.
- Step 2: On a lightly floured surface, roll one half of the dough into a 1/8 inch thick circle large enough to fit into the bottom of a 9 inch pie plate.
- Step 3: Transfer to the pie plate. Refrigerate while you prepare the filling.
- Step 4: In a large bowl, mix sugar, flour and cinnamon. Stir in the peaches and lemon juice.
- Step 5: Add the filling to the chilled pie crust and place back into the refrigerator to chill.
- Step 6: Roll out the remaining dough into a 1/8 inch thick circle.
- Step 7: Transfer to the top of the chilled pie. Trim the edges of the top crust and the bottom crust, leaving enough bottom crust to cover the edge of the top crust neatly. Crimp the dough to seal the edges.
- Step 8: Slash vents in a few places using a sharp knife.
- Step 9: Chill the assembled pie in the refrigerator for at least 30 minutes.
- Step 10: Place the oven rack in the bottom third of the oven. Line a baking sheet with parchment paper or aluminum foil to catch any pie leakage.
- Step 11: Whisk together the egg and tablespoon of milk.
- Step 12: Remove the chilled pie from the refrigerator and brush the top with the egg-milk mixture. Sprinkle with white sugar then place the pie on the prepared baking sheet.
- Step 13: Bake the pie in the bottom third of the oven for about 45 minutes to an hour or until the filling is bubbling in the center.
- Step 14: Serve warm or let cool before serving.
Notes
Cover entire pie loosely with foil if the crust is getting too brown.
- Prep Time: 30 minutes
- Cook Time: 45 minutes
- Category: Desserts
- Method: Baking
- Cuisine: American
Nutrition
- Serving Size: 1 slice
- Calories: 283 kcal
- Sugar: 32 g
- Sodium: 128 mg
- Fat: 8 g
- Saturated Fat: 3 g
- Unsaturated Fat: 5 g
- Trans Fat: 0 g
- Carbohydrates: 51 g
- Fiber: 3 g
- Protein: 4 g
- Cholesterol: 19 mg